This classic from Austria is one of the most famous and delicious desserts. Also, thanks to this recipe you will see that it is much easier to prepare than you thought.
f you want to surprise this Christmas with a dessert worthy of the most demanding palates, the Sacher cake is perfect for it. It is one of the classics of pastry, whose origin we find in Vienna, and that will stand out among the dishes of your Christmas menu. It owes its name to Frank Sacher, the pastry chef who first made it in the early 1800s. You can even taste it at a hotel of the same name.
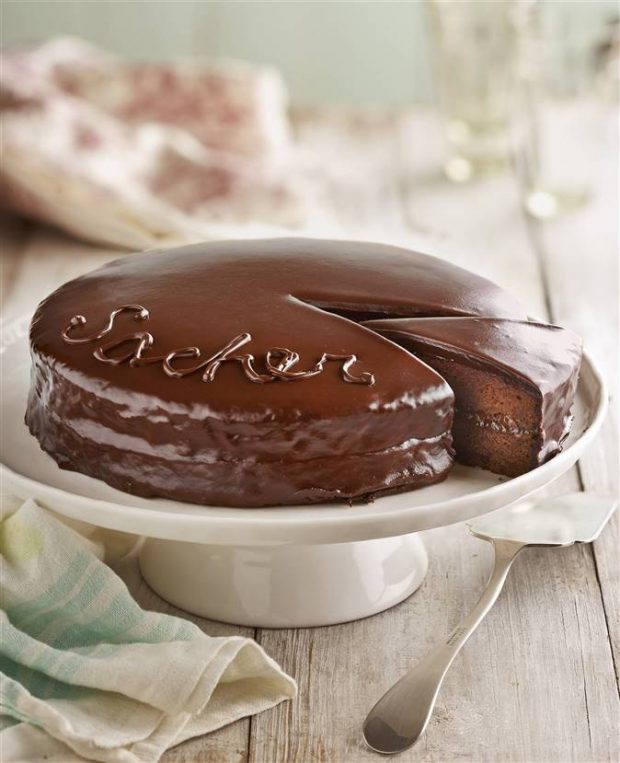
The recipe consists of three parts :
- Biscuit
- Filling
- Coverage
It is a relatively simple step-by-step, but keep in mind that you need a little more than an hour for this preparation. So take your time and enjoy it!
The essential thing for this cake to be delicious is the dark chocolate coating and the truffled inner cake with a layer of apricot jam, although there are varieties that use blackberry and raspberry. You can put the one you like the most. You can even present it in individual mini cakes, as easy to prepare as the large ones and just as tasty.
TIME: 1 h 15 min + rest
Ingredients (for 12 people)
- 6 yolks
- 6 egg whites
- 180 g of flour
- 175 g butter, softened
- 175 g of fondant chocolate
- 180g sugar
- 200 g apricot jam
- 1 sachet of vanilla sugar
- a pinch of salt
For the chocolate coating:
- 300 g of chocolate fondant
- 100g butter
How to make a Sacher cake step by step
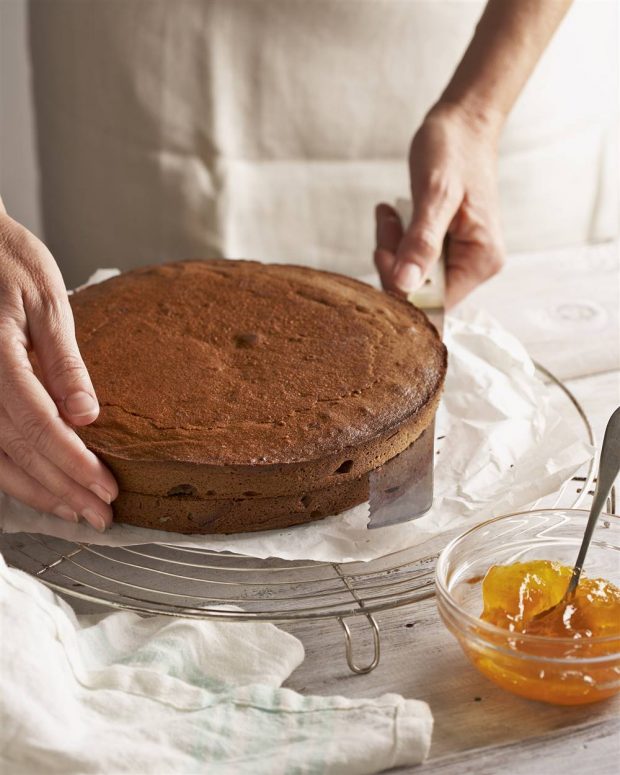
We start with the cake:
- Step 1. Before you start, take the eggs and butter out of the fridge, as they will need to be at room temperature to be perfect before working with them.
- Step 2. Start by preparing the dough to make the cake. Mix and beat 140 grams of butter with the sugars. Separate the yolks and add and mix one by one in the mixture.
- Step 3. The Sacher cake is characterized by having chocolate on the cake. To do this, melt the chocolate over low heat, in a bain-marie, or little by little in the microwave so that it does not burn. Meanwhile, go mounting the whites with a pinch of salt. A tip: to whip the egg whites to the point of snow, you can add a pinch of salt before starting to beat. There must be no yolk left since otherwise, they will not rise. If you do it manually, use some rods to aerate more. First, foam forms, then soft ends appear, and finally, you have to make it thick.
- Step 4. Pour the chocolate into the mixture with the yolks and stir. Next, sift the flour on top and mix well. Then, add the whipped whites and wrap the dough well.
- Step 5. Pour the dough into a 24 cm diameter mold lined with greaseproof paper, so it will be easier to unmold it. Put the mold in the oven for 40-45 minutes at a temperature of 180 ° C. Then reserve and let it cool. Unmold on a rack. Since biscuits tend to be a bit puffed up, for a perfect finish, flip them over and cut off the elevation a bit to make them level. Then cut the cake in half.
Now comes the filling:
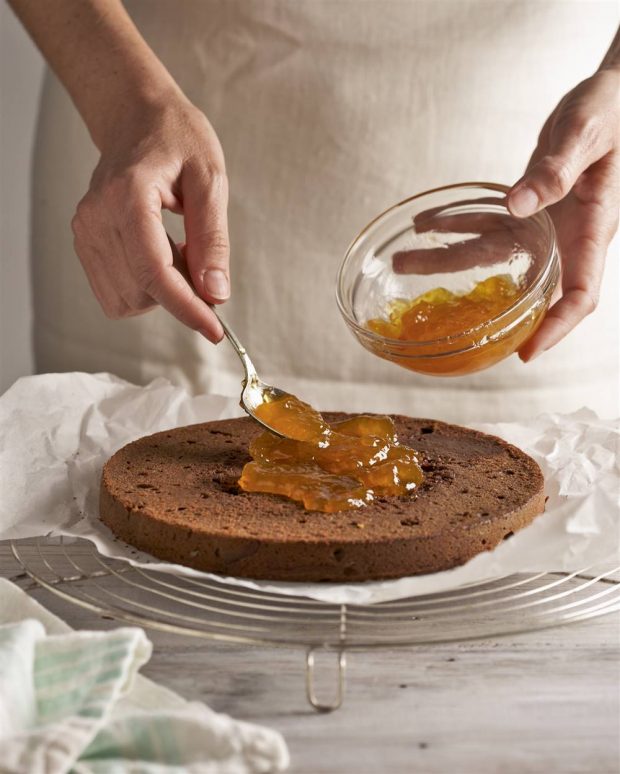
Heat the jam in a bain-marie to make it easier to spread. With the cake cut in half, fill it with half of the hot jam. Cover it and paint with the rest of the apricot jam (or whatever you have chosen for your Sacher cake). Keep in mind that, on the outside, the jam is painted, it does not have to be a thick layer.
It is the turn of the coverage:
- Step 6. Chop the dark chocolate and melt it as we have previously mentioned (over low heat, in the microwave, or a bain-marie so that it does not burn). Add the rest of the butter and stir until well mixed with the chocolate.
- Step 7. Put the cake on a rack and greaseproof paper to collect the excess chocolate. Then, pour the chocolate coating on the cake and spread it quickly, covering both the surface and the edges.
The final touch:
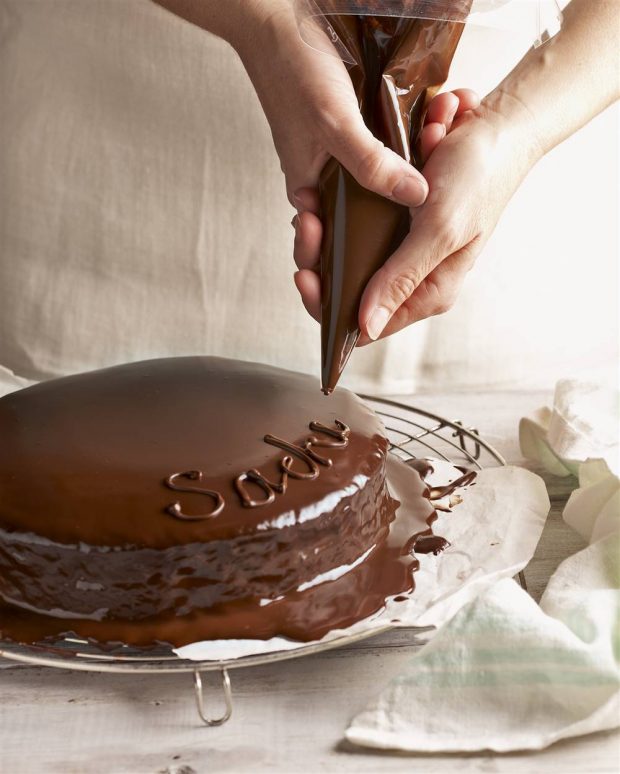
This step is completely optional, but if you want to give the final touch to your Sacher cake, put a Christmas message that also sets dessert time. With a pastry bag write ‘Merry Christmas’ on top to decorate. Let it harden in the fridge for at least 1 hour.

